
My two most recent pieces are a bit different than what I usually paint for a couple of reasons. The first is the subject matter: both the Green Arrow by Knight Models and Rey & BB-8 are pretty well recognized characters. The minis I usually paint would only really be recognizable to others who play that particular game or who paint miniatures and may have seen certain sculpts before. The other big difference for me is that these are the first miniatures I've begun painting with the use of an airbrush. Both of these differences presented some unique challenges for me.
Characterful Characters
Painting the established characters presented a certain challenge as, for the first time for me, the paint jobs would have to meet specific pre-existing expectations about what they should look like. I'm not a 40k player and haven't painted a Space Marine in more than 20 years, but I imagine this is something that 40k players and certainly commission painters have to deal with on a regular basis. While my Infinity minis more or less conform to the standard Corvus Belli look, I think there's a bit more leeway there. However, everyone and their mother knows full well what Rey and BB-8 look like now, so there's no getting away with mucking that up!
For Rey in particular this meant getting the sculpt and the colors just right. The first thing I had to do was a little conversion work. The Hasslefree model, Kami Riko, is pretty close to the Force Awakens heroine, but is not a precise match. This meant that I needed to make two specific alterations to get her looking like Rey.
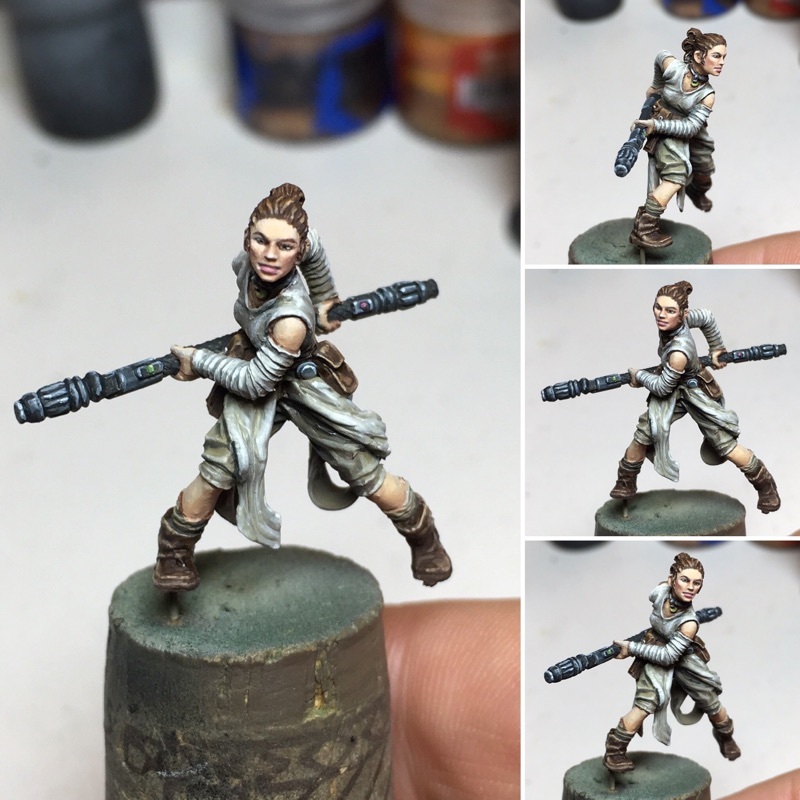
The first change was to her staff. The original miniature's staff is more of a halberd with the one side ending in a large blade. Rey however prefers her blades (sabres if you will) made of glowing light. So step one was to snip that and sculpt a new end to her staff out of greenstuff. With each new project that requires some greenstuff work I'm getting more and more confident. However it's a steep learning curve. The biggest challenge for me is waiting just long enough before trying to actually work the putty into shape. All too frequently I'm jumping the gun and trying to sculpt too early, resulting in a sticky mess that won't hold its shape. That said, I think I was able to draw on a reservoir of patience working with her staff and am very pleased with the result. Even more so when, after priming, my wife couldn't tell which end was the one I'd sculpted!

I'm not sure I can say the same for the longer bits of fabric hanging from her belt. They work just fine painted but I know that I tried to attach them a bit too soon and lost a lot of the texture details that I'd put into the fabric before attaching. C'est la vie... it's all a learning process and I do still like the way it looks in the end. The more I work with it, though, the more respect I have for the amazing results that some painters and sculptors can achieve with greenstuff.
It's Like a Brush... Made of Air!
OK, so airbrushes aren't exactly unknown to the hobby, but I'd avoided taking the plunge for a long while, preferring to rely solely on my brush made of bristles. However, for my birthday this year, I figured maybe instead of asking for more miniatures I'd put in a request for this intimidating new setup (okay, full disclosure, I still asked for more miniatures too!). The airbrush setup reall was intimidating… Fortunately there are no shortage of articles and recommendations on what airbrush and compressor to buy and how to clean it and thin your paints, etc (I relied heavily on Michał "ARBAL" Walczak's advice) so I wasn't exactly flying blind and was thankful to receive a Master Series airbrush and compressor.
My initial outings with the new airbrush were simple, starting with priming my miniatures. I've had mixed success with the rattle can primers in the past and more than once have finished priming only to immediately drop the mini into a bath of Simple Green cleaning fluid to strip it clean so I could try again. Moving to an airbrush was a revelation. Priming with the airbrush is a significant improvement over the rattle cans with thin, precise coverage and no fear of the dreaded "fuzzy" finish that has plagued me in the past!
Once I'd gained some confidence with the priming, the Green Arrow seemed like a great first mini to try airbrushing on some actual color. As he's almost totally green, I thought I would try working through my shades of green from dark to light seeing if I could lay in some good highlights with the airbrush before moving on to painting in the details with my trusty Winsor & Newton.
![]()
Results initially were mixed... but not discouraging. I found it all too easy to obliterate the first few colors I put down with my highlights and so after finishing, things felt too washed out to me. But, while I did need to go back in and re-do a lot of the green shading, glazing in some more mid-tones and then working my way back up to some more precise highlights, I was still really happy with how quickly that first layer of paint went down with the airbrush.
After finishing the model, I returned again to the airbrush for his base. I backed off the highlights a bit this time and tried to use the airbrush to get some really good coverage with a mix of rusty reds and browns. In this case, working with the airbrush saved me a significant amount of time. Painting in all those browns wouldn't have been much fun, but getting all of the base tones down with the airbrush was fast and enjoyable. That then let me go back in with the brush to do all the little detail and edge highlights and to lay in some dry pigments.
Moving on to Rey, she's another mini whose clothing is predominantly one color and so, again, perfect for starting with the airbrush. In her case, however, rather than trying to specifically highlight certain areas like I had with Green Arrow, I instead tried using the airbrush to really push the zenithal lighting approach, focusing on getting really dark tones from underneath and then progressing to white/ivory sprayed down from above.
Moving back to my regular brush, I worked to flesh out the color in places, add more distinction to certain parts of her robes and do some black/brown lining to really separate certain areas. However I found that the airbrushed zenithal lighting paid off tremendously. Given how monochrome she really is, it felt like much of the "volumes" had been given weight by the airbrush before I even picked up my brush. In places where I might usually lay down more of a base color, I saw that the airbrush work had put in more of a shadow. The same was true of the highlights. The initial airbrush work pushed the contrast on Rey much further than I think I would have if I'd not started with that step.
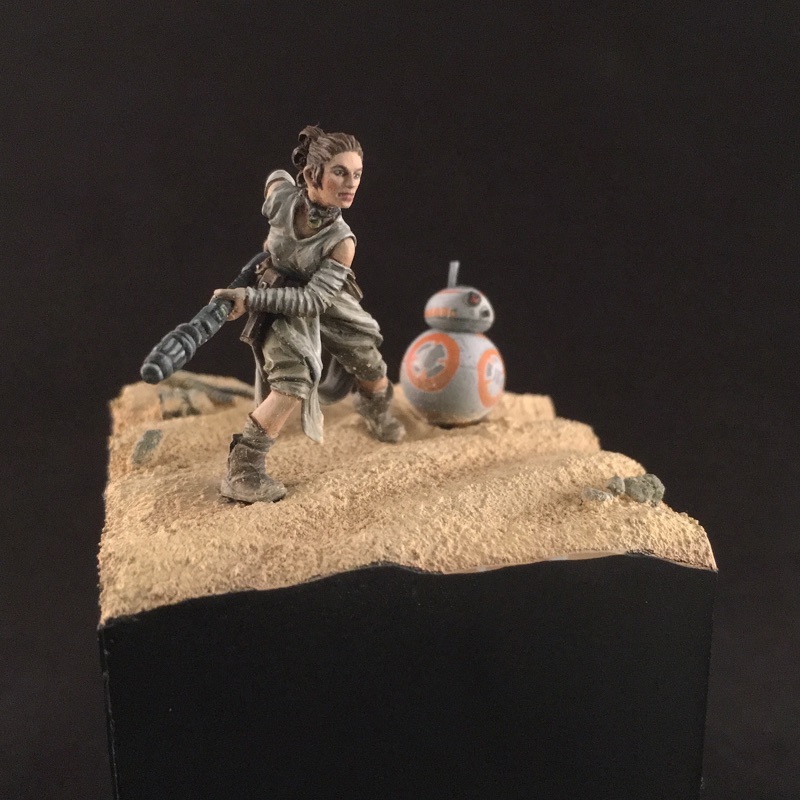
I finished Rey off by painting her skin, hair, boots and staff, then had a lot of fun with all the little freehand work on BB-8. Both my daughters are fans of the roly-poly little droid and so I was gratified to see the smiles on their faces when I showed them the finished little fella!
As with almost all other aspects of this hobby, there's so much more to learn, but I'm very excited to add a new weapon to my painting arsenal!
If you want to see any more of my airbrushing antics as they unfold, be sure to follow me on Twitter or Instagram!