
One of my favorite things about this hobby is the constant ability to learn something new. As a child, that's taken for granted as you're always encountering new facts, figures and concepts both in school and in the world in general. Sometimes, as a "grown-up" (if that's a term that can apply to someone who still plays with "toy soldiers"!) there's not always the opportunity to learn something new. In this hobby, however, there are myriad avenues to teach yourself something new and feel like you're able to constantly learn.
With this miniature, a steampunk version of Florence Nightingale, I set myself a few challenges. The first of my challenges was to try and paint a dark skin tone. Something about the sculpt immediately made me want to paint her in a more Caribbean setting. From my (admittedly minimal knowledge), if something is to be considered "steampunk" it seems like it must exist in a fog shrouded, oil and grime smeared version of Victorian London. Did they never export any of that brass and copper technology to the colonies?! Well, I sought to correct that with Florence and place her looking out on a porch in a traditional(-ish) madras dress somewhere sunny and tropical.
The Porch Base
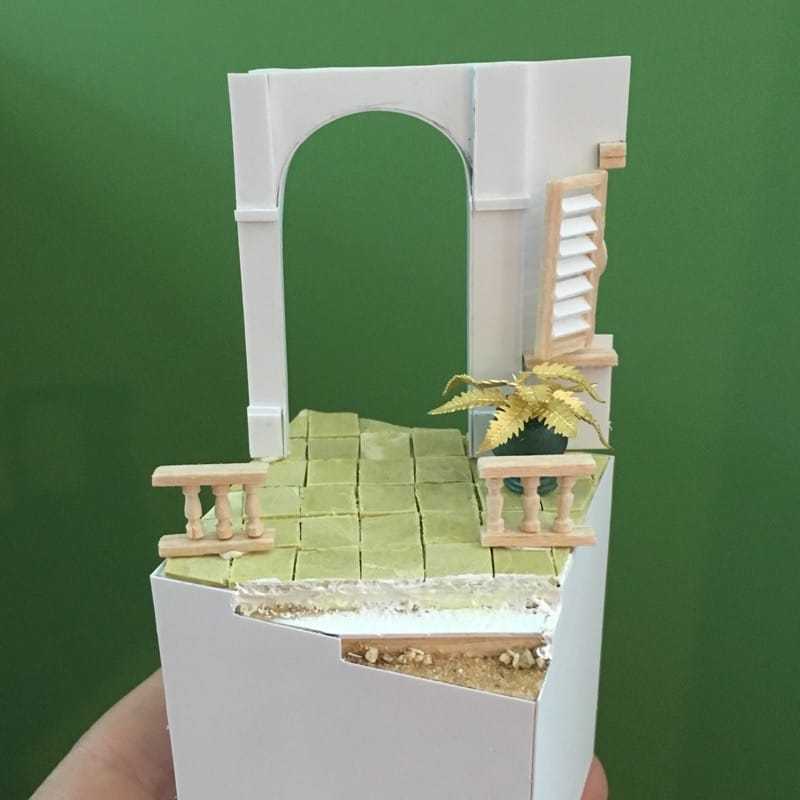
The second challenge was that porch itself. Before beginning, I started with some research. The advantage of a fantastical mini is that historical research doesn't have to be quite as rigorous as what I imagine a lot of historical figure painters do. So, my primary source for Caribbean architecture? Concept art from Assassin's Creed: Black Flag! Rigorously accurate? Maybe not... Evocative and full of character? Definitely.
I decided to build the porch from scratch out of plasticard, something I'd never used before. I picked up some plasticard sheets of mixed weights and set about it with my exacto blade and some superglue. I slowly built up the facade with thick and thin pieces, then cut out the doorway, created a back and then filled in the gaps between the front and back pieces to get something nice and thick so the archway had some heft to it. Once that was done, I covered the front in spackle to give it a nice texture.
For the floor of the porch, I rolled out a thin sheet of milliput on some cling film. I deliberately wrinkled up the cling film so that it gave me a good terracotta-tile texture. Once dry, I then cut the milliput sheet into individual tiles and glued those down.
The balustrade was nice and easy: I used the tops from decorative toothpicks! I've been dying to use these for something for ages and this was finally the right fit. While I had the balsa out, I also put together a shuttered window.
Finally, I sculpted a small urn out of green stuff and used some etched brass leaves to complete the setting.
Painting Florence
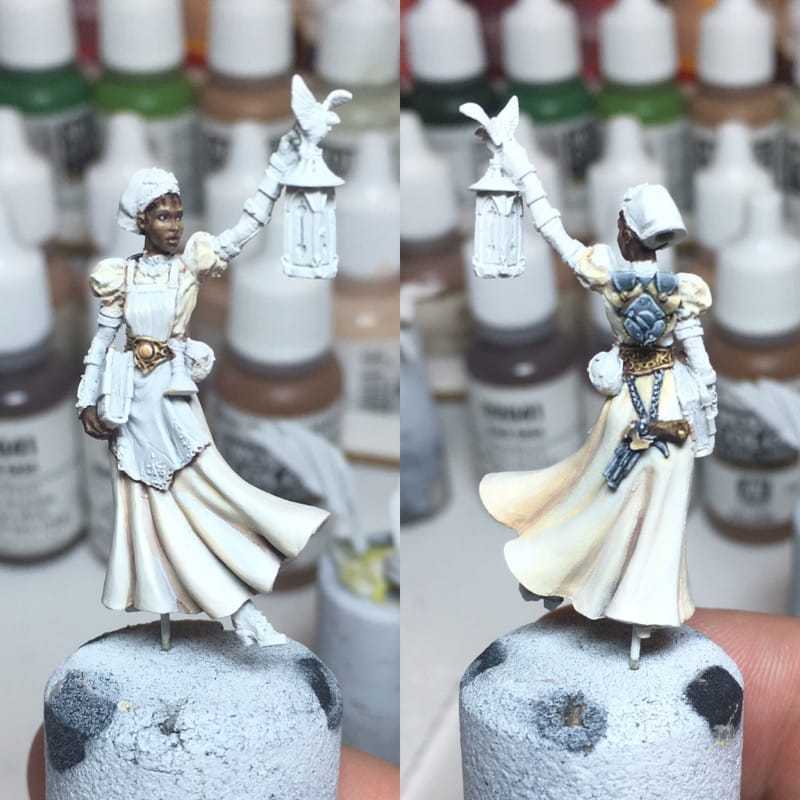
I already mentioned that my first challenge was painting a darker skin tone. I'm pleased with the results, but still have more to learn here. The Reaper triads are very helpful for getting a nice base. I started with the Dark Skin/Shadow/Highlight triad. However, that left things without quite enough contrast and also feeling very flat. I don't recall the exact paint colors, but I tried to bring in some rosiness to the cheeks and to bring the contrast up a little bit further going lighter than the Dark Highlight from the triad.
The next part of the challenge was the madras dress. I think a lot of miniature painters first encounter this kind of painting when painting tartan on a highland warrior. I think the technique for madras is very similar, but the colors obviously very different! My honeymoon 14 years ago was in St. Lucia and our resort was fully decked out in madras so it's a style of fabric that brings back great memories. While it was painstaking to pain the thin lines of various colors, it was fun to sort through old photos looking for inspiration and reference.


If you're keeping score, that's three things I tried to challenge myself with in this piece. Not content to stop there, the fourth new thing I wanted to attempt in this mini was NMM, or "non metallic metals." Essentially, that means avoiding paints with metallic pigment and using standard flat colors to mimic the highlights and shadows of a metallic surface. I primarily tried this with the gold on Florence's lamp and the metallic "feathers" of her wings. While this didn't require the steady hand that the madras did, I think this was the hardest of the challenges so far. I think the results are decent, but I've a lot more practice to go with this technique. I'm also really undecided about whether I prefer "true" metallic paints, or this NMM technique. I'll have to practice it some more before I make my mind up on that one.

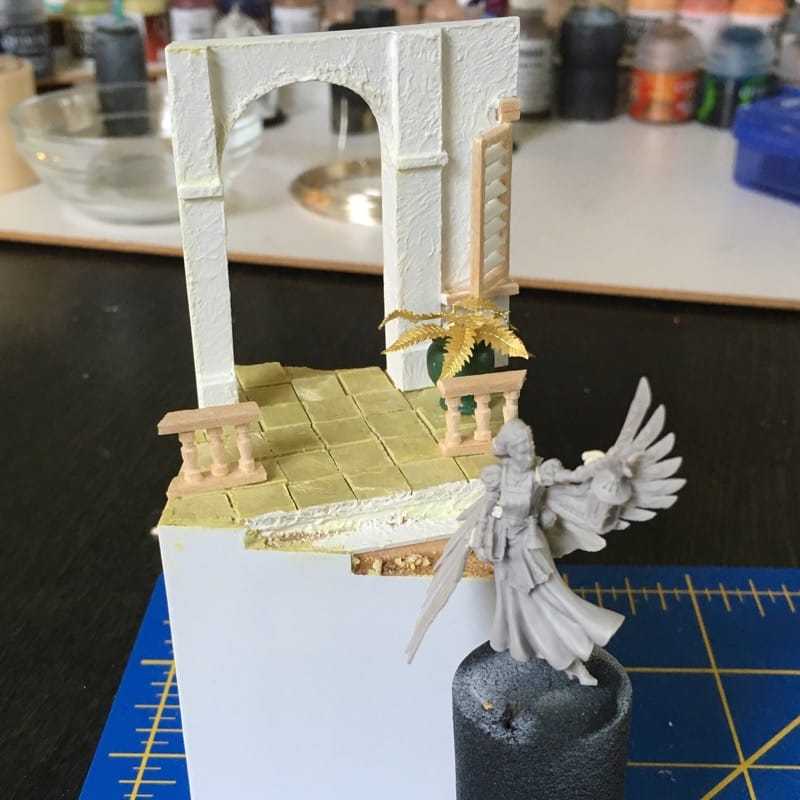
Painting the Base
My last challenge was the most fun, and that was painting the base. For my birthday recently, I received an airbrush and all the fixins required to get it running and painting. This proved to be the perfect project to try it out on and, after a number of practice sessions making some truly inspired fuzzy dots on a sheet of cardboard, I dove in and used it to paint the yellow/orange fade on the back wall and to give a base tone to the terracotta tiles on the floor.
As it turns out, I also a lot to learn about using an airbrush too! But it feels exciting to have a new tool at my disposal. I'm still figuring out just how much to thin paints out, how to avoid paint drying on the tip of the needle, how to fully clean the airbrush both between paints and after a full session, but these are fantastic challenges to sink my teeth into. Being able to call up video after video of tips on YouTube doesn't hurt either.
Once all's painted and done, I'm very pleased with the results. Take a look at all the finished photos of Florence in the gallery.